How to do the perfect at-home manicure
By Zoe Greenwood, April 2 2020
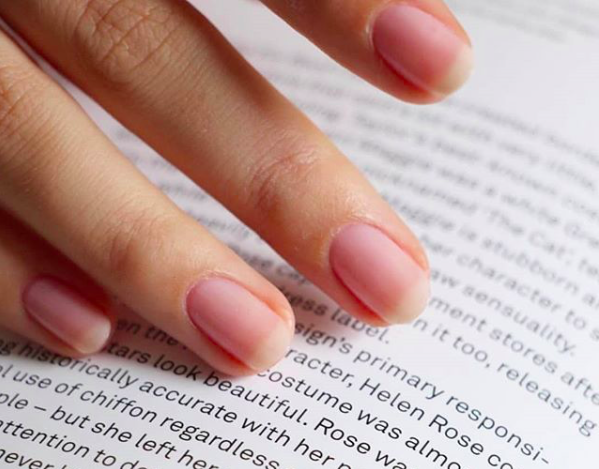
Getting your nails done is one of life’s greatest pleasures. Whether it’s once a month, once in a blue moon or every week, you can’t deny how ‘put together’ it makes you feel. If, at the moment, you’ve decided to take a break from your nail technician or getting them done is simply not an option at the moment, there’s never a bad time to learn how to do one yourself. So, we spoke to one of our expert Salonettes on how to do the perfect at-home manicure. While it may look super easy, there are a lot of things that can go wrong from chipping to nail smudging, but with a bit (…or a lot) of practice, you’ll be getting your own bookings in no time!
What you’ll need:
-
Nail polish remover
-
Nail clippers
-
file
-
buffer
-
Manicure sticks or a cuticle pusher
-
Cuticle remover
-
Hand lotion
-
Cuticle oil
-
Basecoat
-
Polish of your choice
-
Topcoat
Step 1: Clean your nails with polish remover
Before starting your manicure, we recommend using nail polish remover to take off any old polish. Even if you don’t have polish on, it’s still a good idea to apply it to each nail in order to get rid of any oils and dirt that could ruin the polish application. After, give your hands and nails a quick wash with soap and warm water.
Step 2: Clip and file your nails
If your nails are a bit too long, clip them and start filing them gently to the shape that you want – this could be round, square, or stiletto. Not sure what shape suits you best? Take a look at our post here for some inspiration! When it comes to filing, we recommend gently filing your nails in one direction as opposed to filing it in a back and forth motion. Doing it in the same direction will reduce the risk of any breakage and ensure a smoother finish.
Step: Buff
Once you’re happy with the shape and length of your nails, take your buffer and gently buff the top and side of your nails. Buffing is used to create a smooth surface and get rid of any leftover oil residue. It might not seem that important at the moment, but trust me, if you haven’t buffed your nails, you’ll notice the effect it has on the polish.
Step 4: Cuticle care
The next step is to take your cuticle remover – we recommend the CND … and apply a small amount on all your cuticles. This will help soften the skin around your nails so you can remove all dead skin. Use either a cuticle pusher or a wooden stick and gently push back your cuticles to reveal the nail plate – you’ll notice that this will make your nails look longer.
If you’re doing an at-home manicure, we don’t recommend that you cut your cuticles. Your cuticles protect your nails from bacteria and if you cut them badly, it can make you prone to infections – definitely not the type of manicure you want!
Step 5: Wash your hands
Now that you’ve prepped your nails, it’s time to get rid of all the oils and wash your hands with warm water and soap. You might remember having to do this with your nail technician. Leftover oil on the nail plate will have a noticeable impact on your polish and can cause them to chip.
Step 6: Apply the basecoat
Base coats help protect your natural nails from colour stains, prevent chipping and ensure a smoother application. Apply one thin layer of a base coat and leave for a few minutes. If you’re worried about them not being dry, leave them on for longer – better safe than sorry!
Step 7: Apply two coats of your colour of choice
Now’s the fun part (and possibly the most difficult). Take your polish of choice and apply two thin coats on top of each nail. Wait a few minutes between each coat to prevent any smudging. It’s common for people to overload the nail brush with a lot of polish and then doing too many strokes. All you need is enough polish for 3 strokes for the first layer: one down the middle, one down the left side and one down the right side. The second layer is then put on for a fuller and smoother coverage.
Step 8: Finish your nails with a topcoat
A top coat helps seal the polish colour and protects your manicure from chipping. It also adds a glossy finish to your nails! Make sure that you don’t apply too much of the topcoat as it can easily ruin all the hard work you’ve been doing. Just one thin coat of the polish is all that is needed. Top tip: apply a new layer of the topcoat after a few days to keep your manicure looking fresh and glossy!
Step 9: Finishing touches
Congrats, you’ve done the hard part. Lastly, apply some cuticle oil on all your cuticles and really rub it in to keep your hands and nails truly hydrated and nourished. We recommend doing this on a daily basis to ensure your nail bed and cuticles are always in the best condition possible.
And voila, your at-home manicure is done! Show us what they look like on Instagram @lesalonapp – we can’t wait to see!
Zoe Greenwood

After graduating from Brunel University with a degree in Journalism, Zoe has since gone on to become LeSalon’s marketing executive where she oversees and produces content for the blog and social platforms, covering online interviews with female entrepreneurs, beauty tips and trending news.